How To Use Plastic Organizers For Office & Craft Supply Storage
This post may contain affiliate links. This means if you click on the link and purchase
the item, I will receive an affiliate commission. More here: Disclaimer & Privacy Policy
Plastic organizers are the answer!
You know when an office or craft supply storage drawer gets out of hand? Visualize that in your mind. It's a big jumbled mess, right? Well that's where the desk drawer organizer come in.
If you're struggling with drawer "overflowage" then follow the steps on this page. This is how I organized a client's office drawers without buying anything new and using plastic organizers she already had. Happy organizing!

How To Tame Office Drawers With Plastic Organizers You Already Have

1. Empty the drawer completely and wipe it down.
2. Decide what kinds of items should be housed in this drawer. What room is the drawer in? What kinds of activities occur near the drawer?
In my client's case, this drawer was the one nearest the computer that her kids used as well as the craft table. She decided that this particular drawer would hold the smaller office and craft supplies that everyone accessed.
3. Sort the items into categories that make sense to you and your family, once you have established the purpose of the drawer and what will be stored inside - like goes with like.
4. Gather any available organizers from around the house, whether they are actual organizing products you already own or are repurposed items like lidless Tupperware.
In my client's case, we used drawer organizers that she already had and food storage containers without lids.
**If you do in fact want to buy drawer organizers, the modular acrylic organizer is one of my favorites.**
5. Put the categories that you created in step 3 in the small plastic bins or baskets you gathered according to size. In other words, the category with the most items and/or takes up the most space gets the largest organizer.
6. Arrange the organizers in the drawer by putting the most frequently-used items in the front and the less-frequently utilized in the back.
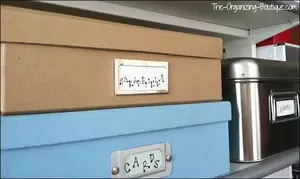
7. Label each category so that everyone in the house knows where to find and where to put back each item.
As you can see in the picture above, labeling does not have to be fancy; it just has to do the job. For this client, we simply wrote on note cards that she already had and folded them over the edges of the drawer organizers.


I Crush Clutter T-Shirt
(and more customizable products from Zazzle)
You might also like these...
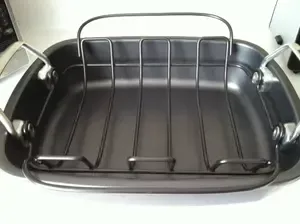
Reuse A Roasting Pan Rack | Recycle Household Items
I repurpose my roasting pan rack as a pot lid organizer when it's not in use. I love to recycle household items in new ways. Here's how I do it!
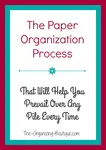
Organizing Office Files | Office Organization Tips
I can find ANY piece of paper in my office in 2 minutes or less. It's awesome; here's my exact process for organizing office files as well as some great paper organization products. Enjoy!
Business Card Storage | Business Card Management
Need help with business card management? Here are some fantastic business card storage ideas!
Like What You Just Read? Want More?

GET UPDATES
MEET THE ORGANIZER

Hi and welcome to The Organizing Boutique! My name is Nealey, and it's lovely to meet you. Read more about me here.

Facebook Comments